


Advanced Search
Search the Knowledgebase


| Author: Microengine Views: 13494 Created: 07-10-2015 03:33 PM | 0 Rating/ Voters |
 |
This article contains steps to restore the xPortal3000 database.
Applies To:
- Software xPortal3000
 Problem Resolution Summary Resolution
Please perform steps below to restore database.
› For safety reason, please do backup copy for your existing database before start the wizard.
› Make sure xPortal3000 Client is not running.
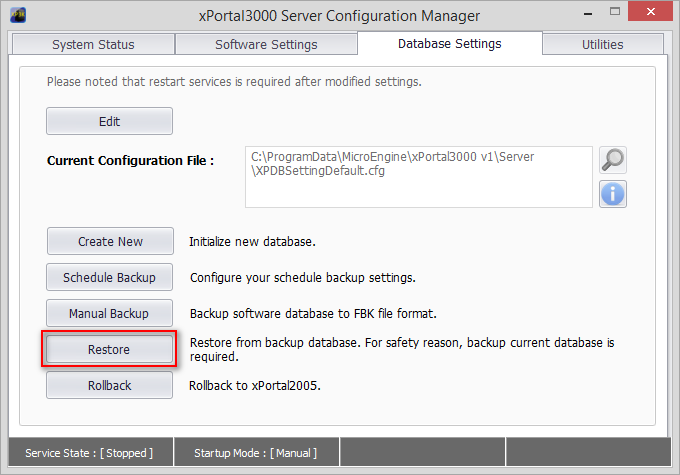
- Open xPortal3000 Server Configuration Manager.
- Make sure Service State status is Stopped.

- Go to Database Settings tab.
- Click Restore button.
If you get message as shown below, please stop the Service first. (Refer to Step 2 above)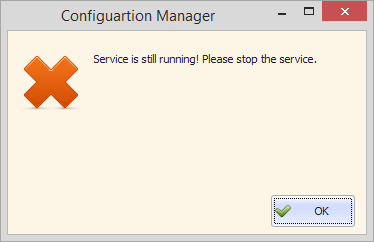
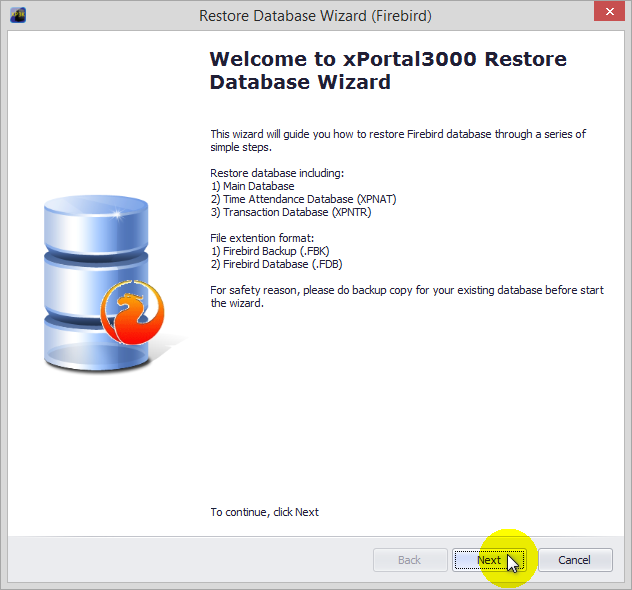
- The following window will be shown. Click Next to continue.
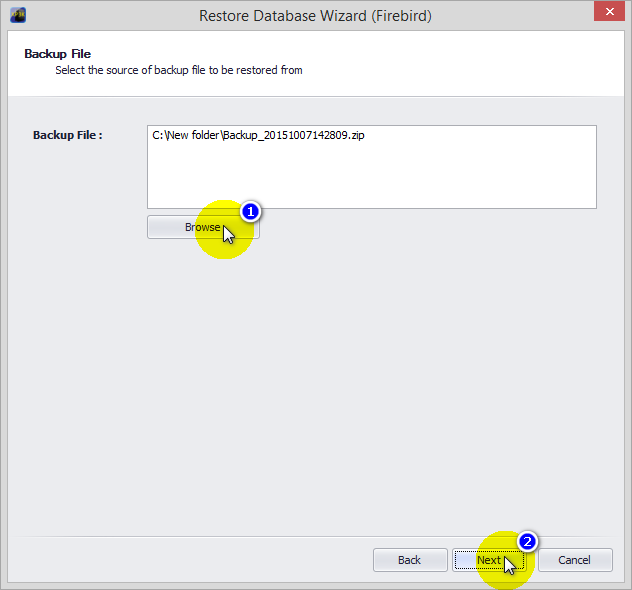
- Browse the source of backup file to be restored from. Then click Next.
- The file to be restored will be auto populated according to the source file.
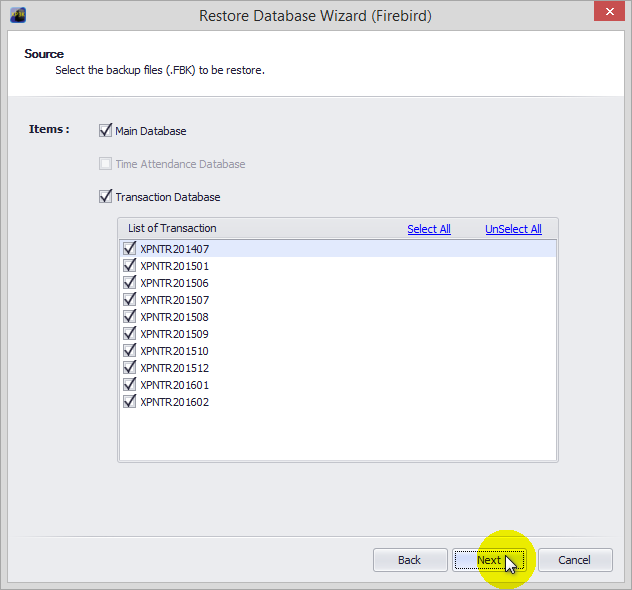
- Please select which backup files that you wish to restore.
- Then click Next to continue.
- At this section, please select database destination.
- You may choose either:
- Restore as new database
› The wizard will create a new database and restore the backup file accordingly.
› Make sure no existing config file/ database is located at Config. Log Folder and Database Folder selected.
› Otherwise, you are required to select another location.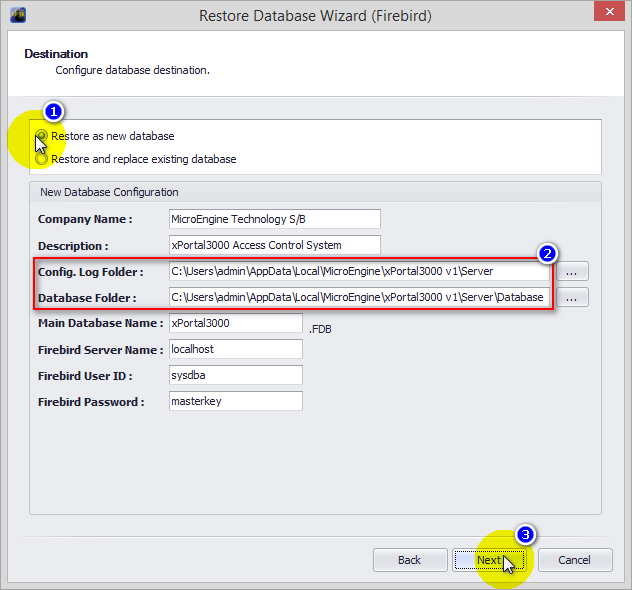
- Restore and replace existing database
› The wizard will restore the backup file and replace existing database.
› Select which existing database that you prefer to replaced with backup database.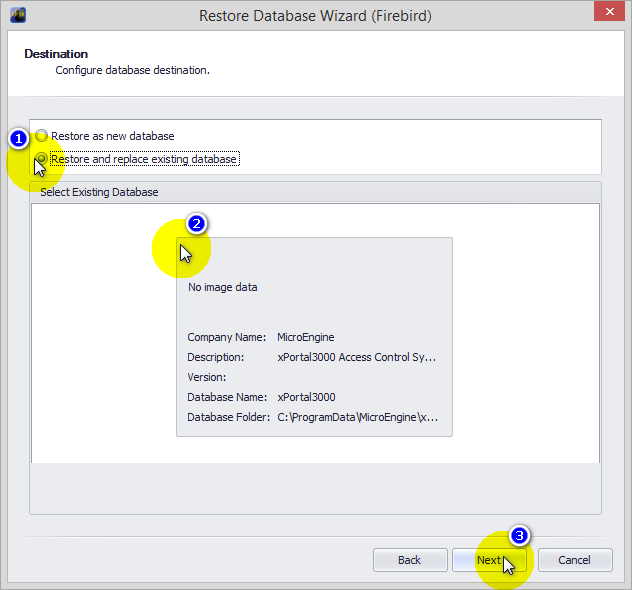
- Click Next to continue.
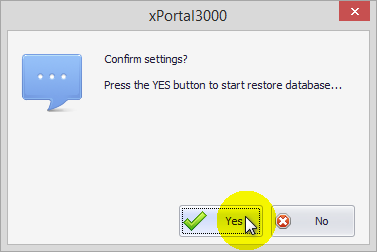
- The following pop up message will be shown.
- Click Yes to start restore database.
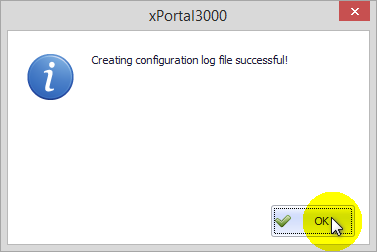
- The wizard will create a new configuration log file. (Only if Restore as new database is selected)
- Click OK to continue.
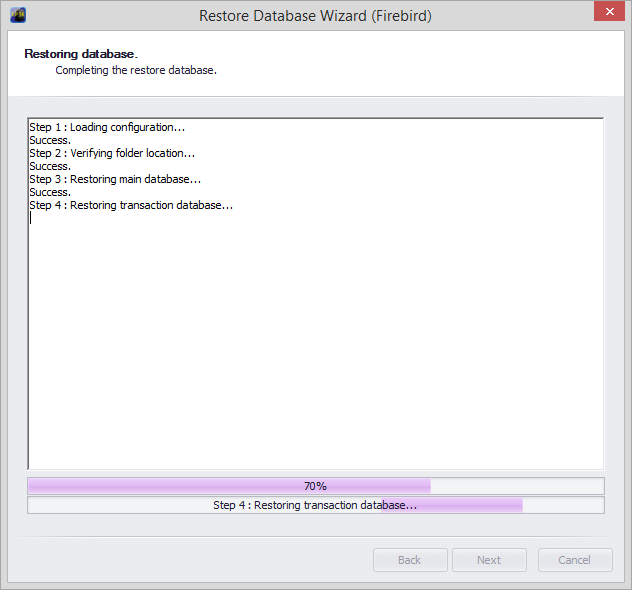
- The wizard will start restore the backup database.
- Please wait until the wizard complete restore the database.
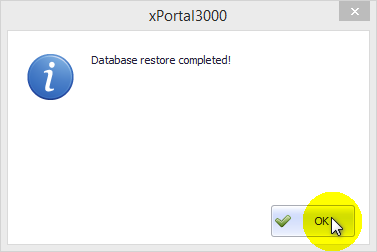
- The following pop up message will be shown once the database restore is completed.
- Click OK to continue.
- Click Next to continue.
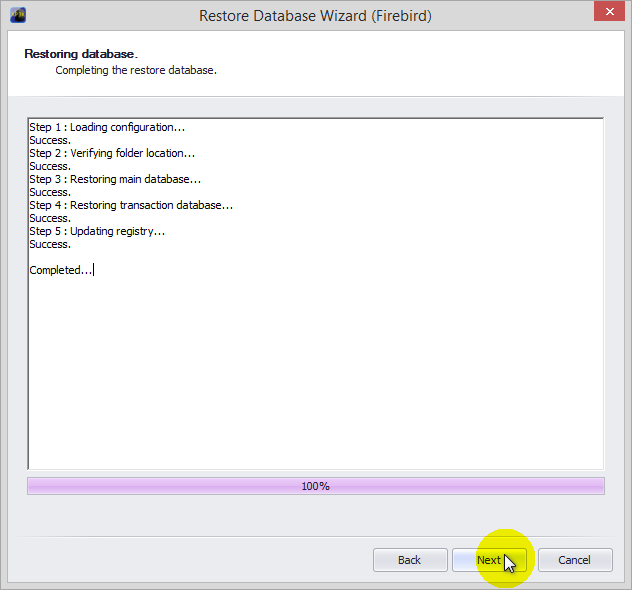
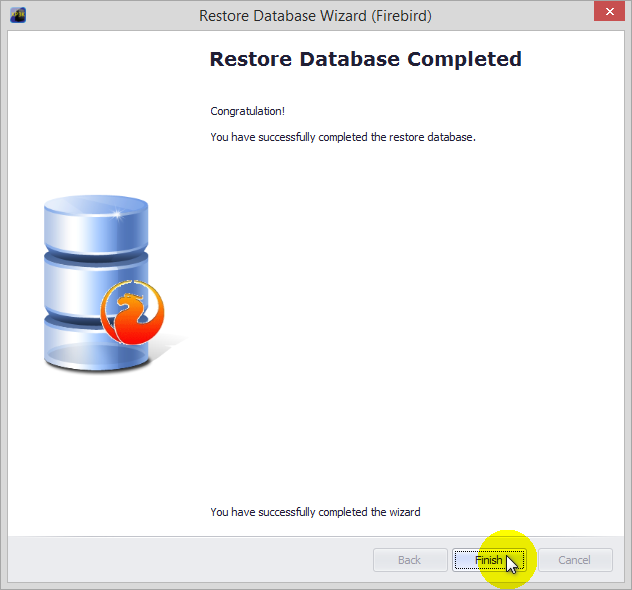
- You have successfully completed the restore database.
- Click Finish to exit the wizard.
- Start the xPortal3000 Service and login to xPortal3000 Client.
Comments
-
There are no comments for this article.
Submit Feedback on this Article
