


Advanced Search
Search the Knowledgebase


| Author: Microengine Views: 19598 Created: 26-05-2015 03:34 PM | 0 Rating/ Voters |
 |
This article contains steps to configure the work/ attendance schedule in the software.
Applies To:
- Software xPortal2005
- Software xPortalNet
- Software xPortal3000
 Problem Symptoms Cause (optional) Resolution Summary Resolution
Please perform steps below to solve the issue:
Step 1: Add Shift Setting
- Login to xPortal Client.
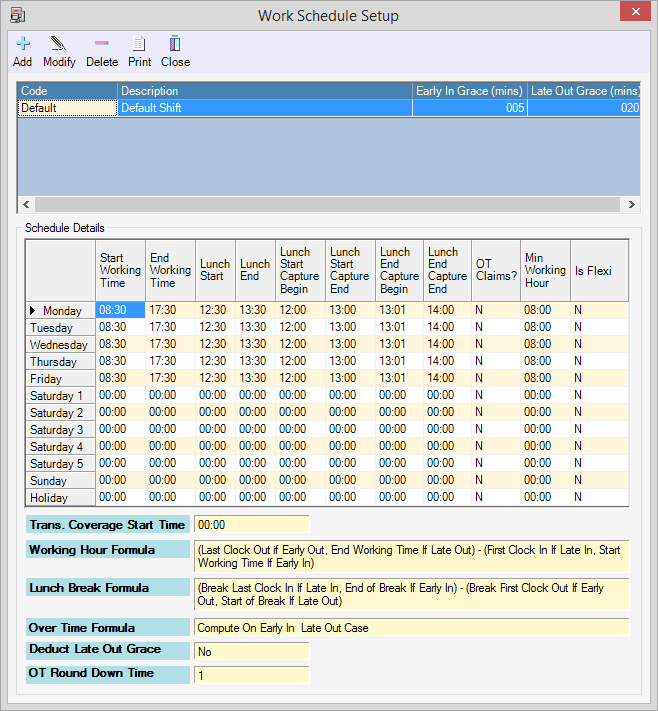
- Open Attendance Schedules. (Go to Reports › Staff Attendance Report › Attendance Schedules)
» For xPortal3000, go to Reporting › Shift Setting. - The Work Schedule Setup window will be shown.
- Click Add button to add new Shift Setting.
- The Add Shift Setting window will be shown.
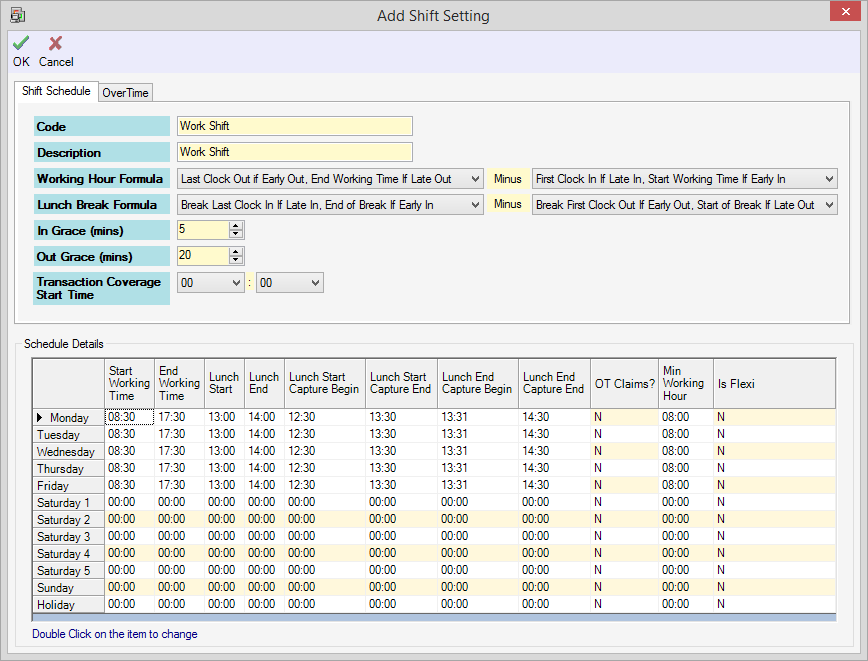
- Fill up the shift information accordingly.
- After filled up all information, click OK to confirm and save the changes.
- Enter the Code and Description.
- Choose your preferred Working Hour Formula and Lunch Break Formula.
- In Grace
› Compassion of time (minutes) that will be given in order to determine whether a staff is Early In/ Late In attendance report. A staff is considered Early In if his/ her first clock in is less than Start Working Time + In Grace. - Out Grace
› To calculate OverTime (OT) work time (Only applicable if OT Claims is Y and Is Flexi is N). - Transaction Coverage Start Time
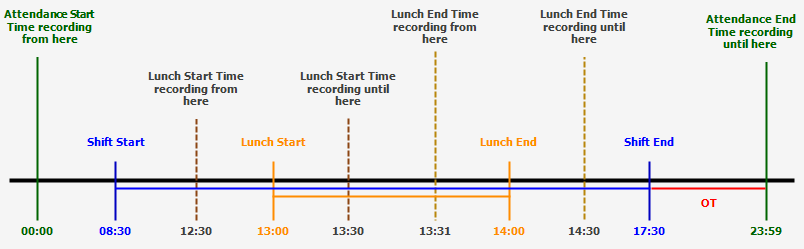
› Specify the start time when attendance transaction will be considered as valid. - Schedule Details:
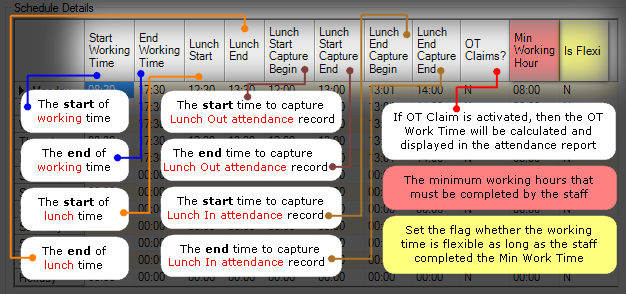
- Below is example illustration for the shift setting above.

- Below is example illustration for the shift setting but included OT.
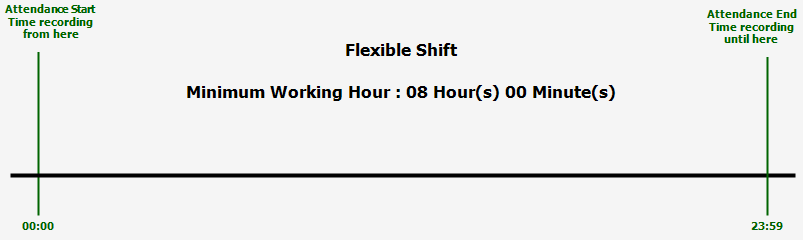
- Below is example illustration for the Flexible Shift setting.
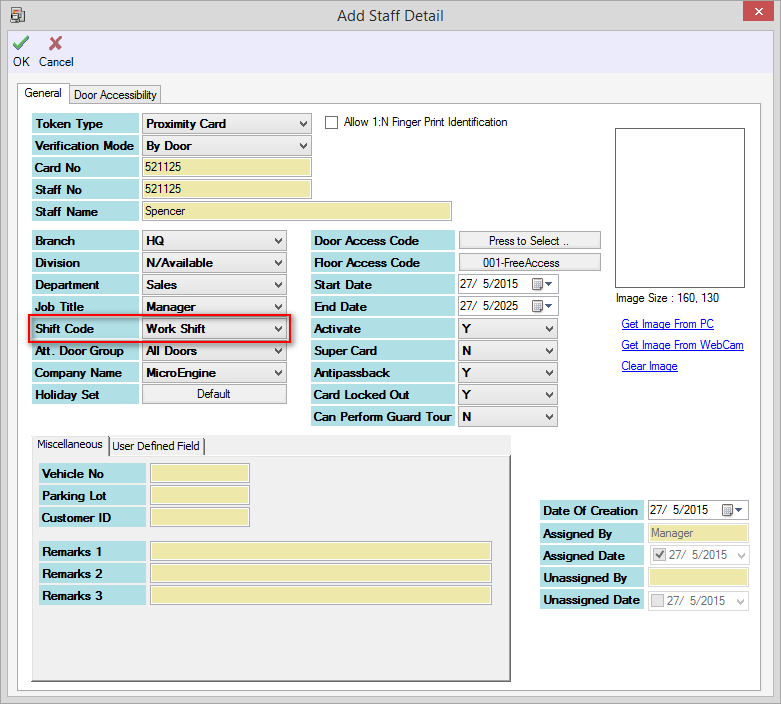
- Open Staff Records to assign the Shift Code. (Go to Data Setup › Access Data Setting › Staff Records)
- Click Add button to add new staff record or click Modify button if the records already exists.
- Find Shift Code fields and select the newly added Shift Setting.
- Click OK to confirm and save the changes.
- Rebuild your Daily/ Monthly Attendance report again.
Custom Fields
- Summary: This article contains steps to configure the work/ attendance schedule in the software.
- Search Tags: work schedule, attendance schedule, daily attendance, monthly attendance, default shift code, shift setting, how to set working day, working day, shift schedule
Comments
-
There are no comments for this article.
Submit Feedback on this Article
