


Advanced Search
Search the Knowledgebase


| Author: Microengine Views: 15453 Created: 03-04-2015 03:55 PM | 0 Rating/ Voters |
 |
This article contains steps to configure the Real-Time Export using xPortal2005.
Applies To:
- Software xPortal2005
 Problem Symptoms Cause (optional) Resolution Summary Resolution
Export Format Setup
› Skip this step if you want to use the default export format
Export Transaction Setup
View Export Transaction
› Skip this step if you want to use the default export format
- Login to xPortal2005 Client.
- Open Transaction Reporting. (Go to Reports › Event Report › Transaction Reporting)
- Click button

- The following window will be shown:
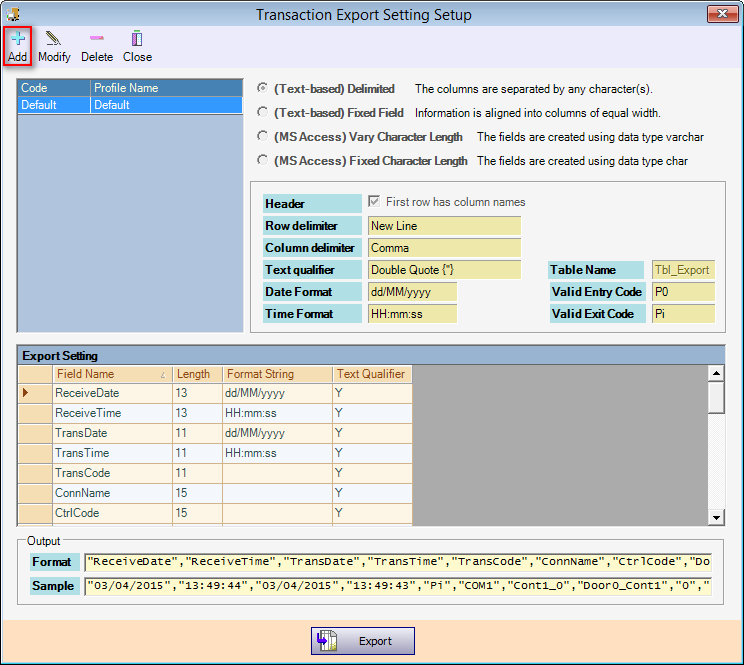
- Click Add to configure new export setting.
- Enter the Profile Code and Profile Name.
- Select the File Type that you preferred.
- Set the Header, Row delimiter, Column delimiter and Text Qualifier.

- At Field Selection:
- Select the field to be included in the export file.
- Click Add.
- The selected field will be added to the Export Setting accordingly.
- You can see the format created and sample output transaction at the Output section.
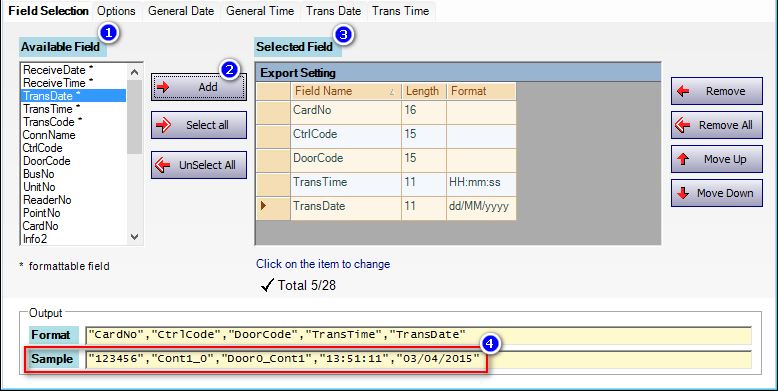
» You may change the Output order by toggle the Move Up or Move Down button. - Click OK to confirm and save the changes.
Export Transaction Setup
- Login to xPortal2005 Server.
- Open Export Transaction. (Go to Transaction › Export Transaction)
- The following window will be shown:
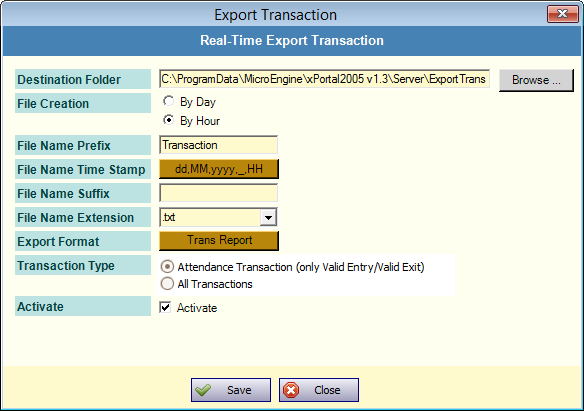
- Browse the Destination Folder and select the File Creation that you preferred.
» File Creation is the way you determine how the system will generate the file name. The naming option is either By Day or By Hour only.
- Set the File Name Prefix that you preferred or leave as default.
- You can define the File Name Time Stamp that you preferred.
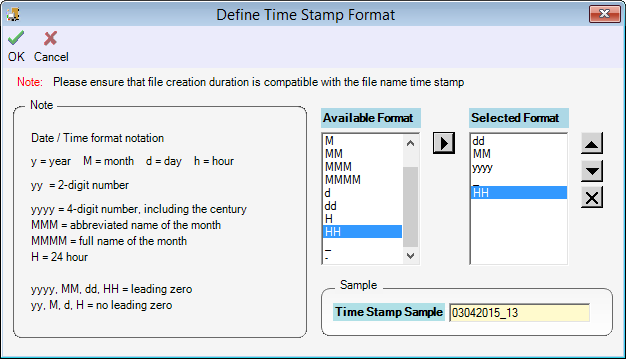
» If File Creation chosen is By Day, the Available Format will not show the hour format. - Choose the File Name Extension to be saved as .txt or .csv format.
- Choose the Export Format that you have created just now or select the Default format.
- Choose the Transaction Type to be exported.
- Attendance Transaction (only Valid Entry/Valid Exit)
- All Transactions
- Click Activate to activate the Real-Time export setting.
- Click Save to confirm and save setting.
- Click Close to finish.
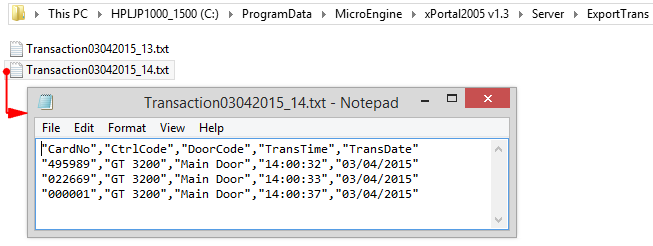
View Export Transaction
- Go to Real-Time Export Destination Folder.
- You may open the exported transaction file accordingly.
Video Guide (Real-Time Export)
- This video guide will show you how to configure Real-Time Export in xPortal2005:
Custom Fields
- Summary: This article contains steps to configure the Real-Time Export using xPortal2005.
- Search Tags: real-time export, xportal2005, transactions not exported
Comments
-
There are no comments for this article.
Submit Feedback on this Article
