


Advanced Search
Search the Knowledgebase


| Author: Microengine Views: 22038 Created: 04-03-2015 10:15 AM | 0 Rating/ Voters |
 |
This article contains steps to install Microsoft .NET Framework 3.5.
Applies To:
- Windows XP, Windows Vista, Windows 7, Windows 8, Windows Server 2003, Windows Server 2008, Windows Server 2008 R2
- Software xPortal2005 v1.3
- Microsoft SQL Server 2008 (Pre-Installation)
 Resolution Summary Resolution
Please complete the following steps in order to install the Microsoft .NET Framework 3.5:
Install the following Microsoft .NET Framework.
- Microsoft .NET Framework 3.5 Service Pack 1 (dotnetfx35.exe).
- Restart your PC after completed the installation.
Turn on Microsoft .NET Framework 3.5 Service Pack 1 feature.
- Click Start button.
- Go to Control Panel › Programs › Programs and Features.
- Click "Turn Windows feature on or off".

- A window as follows will pop out.
- Windows 7 (Check all checkboxes under Microsoft .NET Framework 3.5.1)

- Windows 8 (Check all checkboxes under Microsoft .NET Framework 3.5)
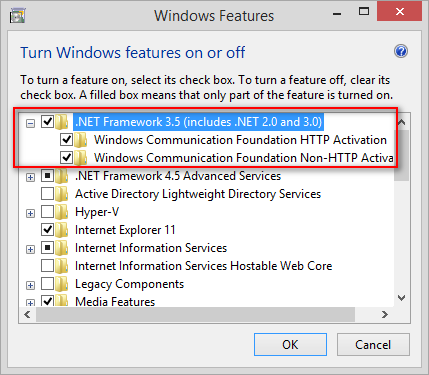
- Click OK and wait until installation complete.
- Restart your PC after completed the installation.
Turn on Microsoft .NET Framework 3.5 Service Pack 1 feature.
- Click Start button.
- Go to Administrative Tools › Server Manager.
- In Server Manager click Features on the left, verify that all Microsoft .NET Framework 3.5.1 features are listed.
- If listed, close Server Manager.
- If not listed, click Add Features on the right.

- Check all checkboxes under .NET Framework 3.5.1 Features.
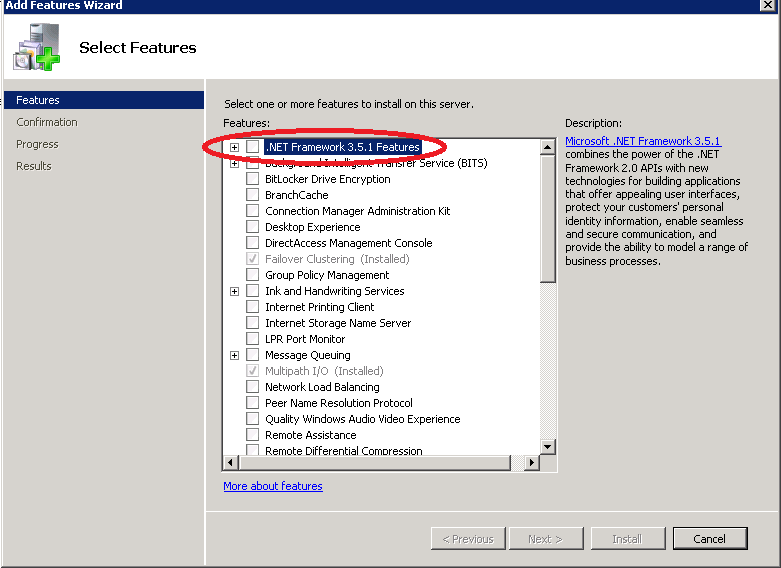
- Agree to add the required role services and features for the .NET Framework 3.5.1 by clicking "Add Required Role Services".

- At this time, the check box for the .NET Framework 3.5.1 Features is selected. You can then click Next to begin the installation.

- On the Introduction to Web Server (IIS) screen, click Next.

- Verify that the .NET Extensibility check box is selected by default, and click Next.
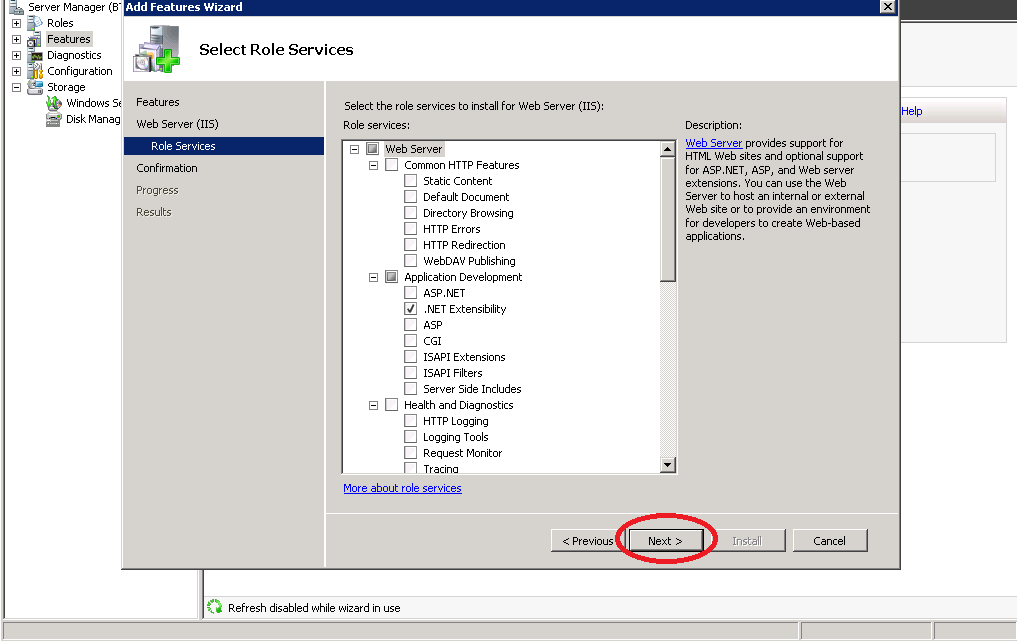
- Click Install to finish the installation configuration and begin the installation.

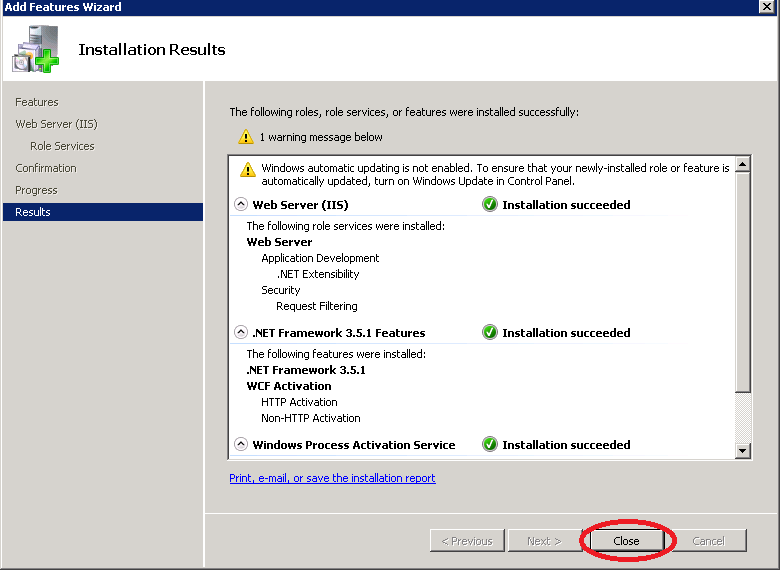
- Wait for the progress bar to complete with the expected results. Please note that you’ll need to have local administrator rights to get past this step, or you’re get an error message. Additionally – the User Account Control (UAC) can give you issues during this time.

- Once the installation has completed, click Close and you’re all set. Notice the warning message in the image below about Windows Automatic Updating not being enabled. You’ll see this quite often – as most people use different products to manage updates on production servers – such as Microsoft System Center Configuration Manager.
| Knowledge Management Systems by: KnowledgeBase Manager Pro v6.2.2 (Built with: JS.GUI - AJAX Code) |
Custom Fields
- Summary: This article contains steps to install Microsoft .NET Framework 3.5.
- Search Tags: installation, microsoft .net framework 3.5
Comments
-
There are no comments for this article.
Submit Feedback on this Article
