Knowledge Base

Knowledge Base
Advanced Search Search the Knowledgebase
How to enrol fingerprint template at the XP-GT controller?
Author: Microengine Views: 19036 Created: 23-02-2015 04:24 PM 0 Rating/ Voters

This article contains steps to enrol/ add new fingerprint template at the XP-GT controller.

Applies To:

  • XP-GT1200L/ XP-GT3200L
  • XP-GT1200LABX/ XP-GT3200LABX
  • XP-GT3200LE
  • XP-GT3200LCPX
  • XP-GT500LE    

 Problem
 

› How to enrol fingerprint template at the XP-GT controller?   

       
 Resolution Summary
 
Steps to enrol fingerprint template at the controller:

Step 1:
› 
Add/ install staff record.
 
Step 2
› Add/ enrol a fingerprint.

         
 Resolution
 

Make sure the staff record has been added into database of the controller XP-GT before enrol/ add a new user fingerprint. 

Step 1: Staff Record

› To add/ install staff record, please follow steps below:

  1. If your controller is not connected to the software, see AA-00455
  2. If your controller is connected to the software, see AA-00279


Step 2: Fingerprint

› To add/ enrol a fingerprint, please follow steps below:  

  1. Enter Programming Mode.
  2. Press '3' for Fingerprint Menu.
  3. Press '1' for Add Fingerprint. The screen below will be shown. Enter the User ID of the user that you would like to add the fingerprint data to. Press small to confirm and proceed to the next screen.

    » You may also presenting the user card near to the keypad area, the card number will be detected and appear on the screen automatically.

  4. Enter the Template Index of the fingerprint.

    » Each user may add/ enrol up to 5 different fingerprints. You may choose from number [1] to [5] of Template Index for each fingerprint to be enroled.

  5. Press small to confirm and proceed to the next screen. 
  6. Enter the Finger Index of the user.

    » Each user may choose from number [0] to [9] of Finger Index to represent the fingerprint to be enroled.

  7. The image below shows the finger index representation.

  8. After enter the Finger Index number, press small to confirm and proceed to the next screen.
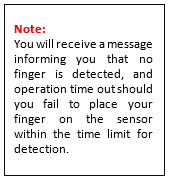
  9. The screen will prompt you to place your finger on the sensor surface and the sensor will be turned on with red light. Please place your finger and apply light pressure on the sensor surface now and wait for your finger to be detected.

  10. Your fingerprint will be enroled into the database shortly thereafter. A confirmation will be received when your fingerprint is successfully enroled into the database. Do not remove your finger until the enrolment process is complete. 
  11. Enter another User ID to add another fingerprint, or press small to return to the Fingerprint Menu.
    » It is recommended that each user add/ enrol at least 2 fingerprints template.
Custom Fields
  • Summary: This article contains steps to enroll/ add new fingerprint template at the XP-GT controller.
  • Search Tags: enrol fingerprints, add fingerprints, xp-gt, xp-gt1200l, xp-gt3200l, xp-gt1200labx, xp-gt3200labx, xp-gt3200le, xp-gt3200lcpx, xp-gt500le
Comments 2
  • [SAM]: Unable to enroll finger print via xPortal3000 19-07-2016 09:04 AM #

    Dear Support.

    While i use xPortal3000 to enroll Finger print, there appear : SCANNER NOT CONNECTED. If I manually enroll finger scan on GT device, Then its successful. Can I get the solution to enroll finger print via xPortal3000?

    Thanks
    Sam

  • [Microengine ]: Re: Unable to enroll finger print via xPortal3000 19-07-2016 04:36 PM#

    Hi Sam,

    1. If you wish to enrol fingerprint through xPortal3000 software, you must purchase MAS-BioMini (BioMini Optical Fingerprint Sensor) from MicroEngine.

    2. If you have already purchased it, kindly connect the device to the PC where the xPortal3000 software is installed. Once the software detect the device, you may enrol the fingerprint accordingly.

    3. Otherwise, you must enrol the fingerprint using XP-GT controller and perform "Get Template" to save the fingerprint template enrolled from the controller to the software. Kindly see http://www.microengine.net/kb/article/AA-00234 for the steps.

    Please let us know if you have any further clarification.

Submit Feedback on this Article