


Advanced Search
Search the Knowledgebase


| Author: Microengine Views: 37429 Created: 28-12-2014 02:14 AM | 0 Rating/ Voters |
 |
This article contains steps to setup the network connection for XP-M2000i controller. The communication shall up between the controller and the xPortal software after completed the setup.
Applies To:
- XP-M2000i
- Software xPortal2005 v1.3, Software xPortalNet, xPortal3000
 Resolution Summary Resolution
Follow the following steps to configure network connection for XP-M2000i controller.
- Check the wiring connection is all correct. See
 Wiring connection diagram for XP-M2000i.
 - Check the network cable is working properly.
- The Yellow LED at network cable LAN socket should be blinking upon controller's power up.
- Please Coldstart the controller if this is a new installation.
- Login to controller Web Diagnostic.
- Open browser and type http://192.168.1.10 (Default IP Address) in the address box.
Key in the default username and password.

The following windows will be shown:

- Check the available IP Address - to be assign as Controller's IP Address.
- Ping IP Address to ensure the IP Address is not in used by other device.
- Run Command Prompt window › Type ping followed by IP Address then press Enter.
- You must get "Destination host unreachable" as shown below if the IP Address is not in used.
 Ping got Reply
It means the IP Address is in used by others from the same network. Please use other IP Address instead.
- Check the Server PC's configuration.
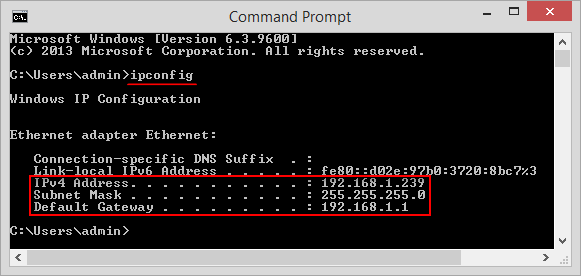
- Get the Server IP Address, Subnet Mask and Gateway from Server PC's configuration.
- Check this configuration from the PC where xPortal Server was installed.
- Run Command Prompt window › Type ipconfig then press enter.
- At Web Diagnostic, go to Configuration › Network. Set the network setting accordingly.

Field Description IP Address IP Address set for the controller. Make sure the IP Address is not occupied by other device. Subnet Mask Similar to Server PC’s Subnet Mask. Gateway Similar to Server PC’s Default Gateway. Server IP Address IP Address where the xPortal Server is located. - Click Save Setting to confirm and save the changes.
Connection Setup
- Open Connection Setup. Go to Server Admin › Connection Setup.
- Add new connection.
- Enter the correct Remote IP Address. It is the controller's IP Address (Refer Step 2).

Controller Setup
- Open Controller Setup. Go to Server Admin › System Device Setup › Controller.
- Add new controller.
- Enter the correct Connection, Unit No, Model No and the Network Type.

Door Setup
- Open Door Setup. Go to Server Admin › System Device Setup › Door.
- Add new door.
- You can add up to 2 doors. This including Entry and Exit for each door.
- Select the correct Unit No of the door. Maximum Unit No allowed for this controller is 1.

- The software will be reloaded after saving each setup.
- Check the device status from Device List tab.
- The controller and door status should already "Up".
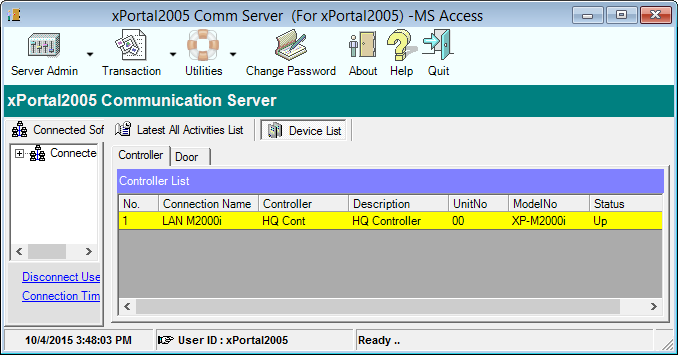

- Finished.
| FAQ Software by: KnowledgeBase Manager Pro v6.2.2 (Built with: JS.GUI - AJAX Frameworks) |
Custom Fields
- Summary: This article contains steps to setup the network connection for XP-M2000i controller. The communication shall up between the controller and the xPortal software after completed the setup.
- Search Tags: xp-m2000i, network connection, lan connection, uplink failed, controller down, no communication, no transaction update, delivery report sent error
Comments
-
There are no comments for this article.
Submit Feedback on this Article
