


Advanced Search
Search the Knowledgebase


| Author: Microengine Views: 27338 Created: 17-03-2015 09:57 AM | 0 Rating/ Voters |
 |
This article contains steps to backup the xPortalNet database.
Applies To:
- Software xPortalNet v1.5
 Problem Resolution
Caution! Modifying database will affect the software behavior. Only perform this steps if you are familiar with the SQL database otherwise kindly request from your IT Technician for help.
To back up the xPortalNet database, please follow the steps below. Please follow all steps in right sequence order.
» This back up database steps also applicable for back up transaction database.
- Make sure xPortalNet software is not running.
- Please ensure that the Service, Server and Client already closed.
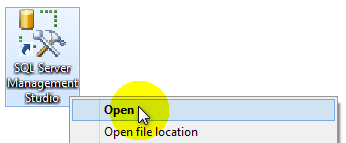
- Run the SQL Server Management Studio.
- The Connect to Server pop up window will be shown. Enter the Login ID and Password. Then click Connect.
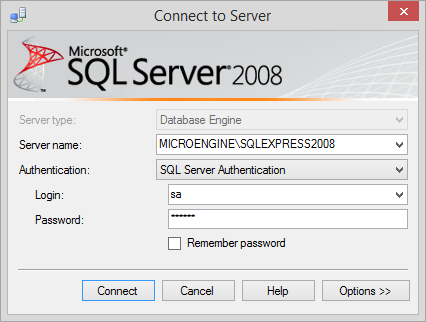
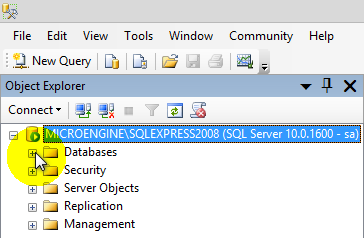
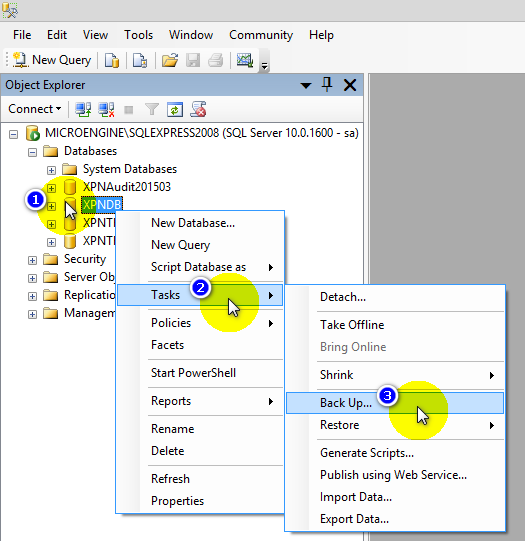
› The Login ID (Instance ID) and Password is created during Microsoft SQL Server 2008 installation. See AA-00290 for the installation step. - At the top left side menu, find the Databases folder and click the plus sign to expand the folder.
- You should found the 'XPNDB' and 'XPNTR' folder after expanding the Databases folder.
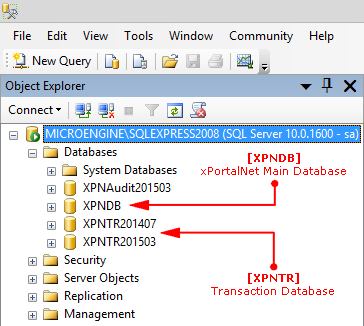
» You may notice that the list of XPNTR folder shown is different. The Transaction database is according to your transaction pull up at the software. - To back up the database, right click the 'XPNDB' folder. Select 'Tasks' and then select 'Back Up'.
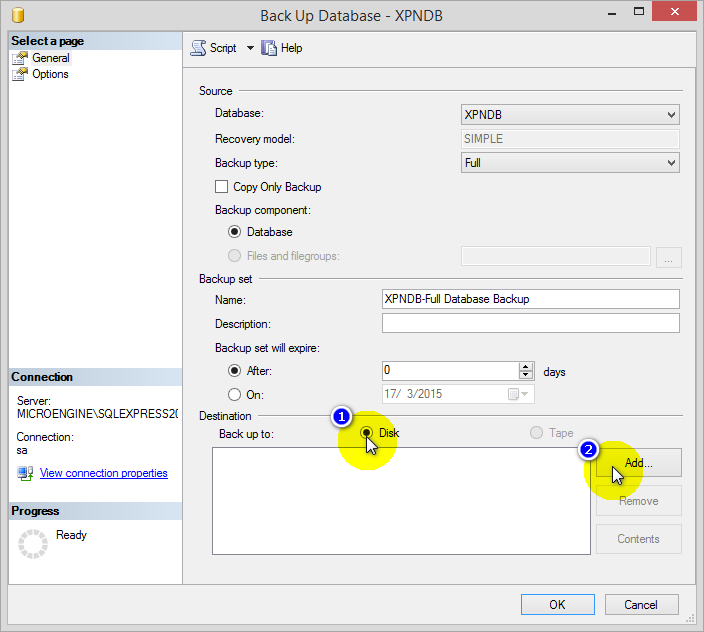
- The 'Back Up Database – XPNDB' window will be shown as following.
- Click 'Remove' to remove default back up destination folder location.

- Please make sure that you have selected Back up to: 'Disk'.
- Click 'Add' to add a new back up destination folder location.
- Browse the destinations on disk for back up destination folder location.
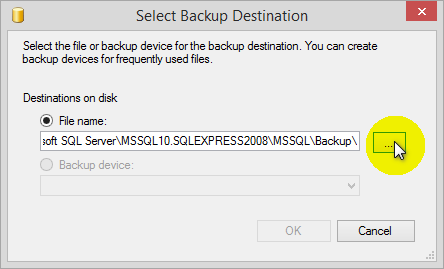
- Select the location that you preferred to locate the back up database.
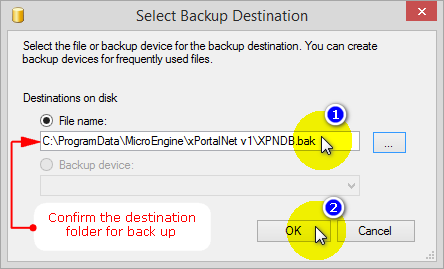
- For this example, the back up destination folder location is at C:\ProgramData\MicroEngine\xPortalNet v1
- Set the File name to "XPNDB.bak" and then click OK.
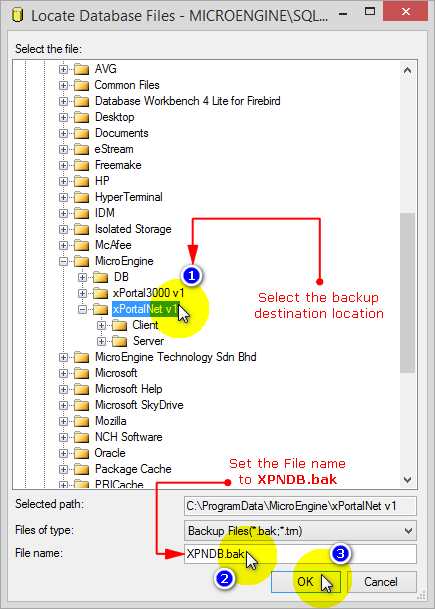
» Please remember back up destination folder location. - Please confirm your back up destination folder location.
- Click OK to continue.
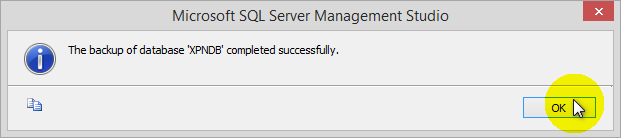
- Click OK to start back up the database.

- You should see this pop-up window when the database back up is completed. Click OK to finish.
- Go to the back up destination folder location to view the file.
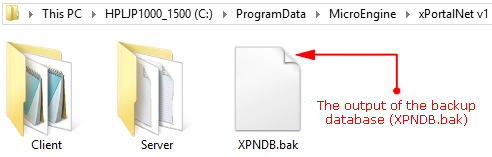
- Back up database is completed.
Custom Fields
- Summary: This article contains steps to backup the xPortalNet database.
- Search Tags: backup, xportalnet database
Comments
-
There are no comments for this article.
Submit Feedback on this Article
