


Advanced Search
Search the Knowledgebase


| Author: Microengine Views: 19808 Created: 18-03-2015 12:05 PM | 0 Rating/ Voters |
 |
This article contains steps to restore the xPortalNet database from old PC to the new PC using existing backup files (.bak file format).
Applies To:
- Software xPortalNet v1.5
 Symptoms Resolution
- Initialize new database in new machine. See AA-00291 to learn how to initialize new database using xPortalNet.
- After database successfully initialized, make sure xPortalNet software is not running.
- Exit the Service, Server and Client completely.
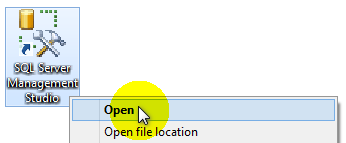
- Open SQL Server Management Studio.
- The Connect to Server pop up window will be shown. Enter the Login ID and Password. Then click Connect.
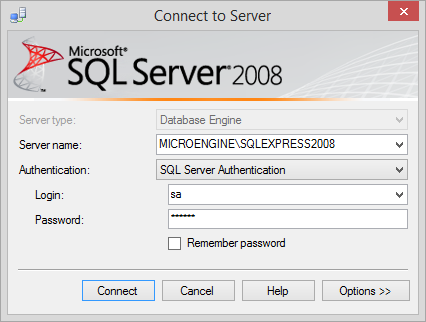
» The Login ID (Instance ID) and Password is created during Microsoft SQL Server 2008 installation. See AA-00290 for the installation step.
- At the top left side menu, find the Databases folder and click the plus sign to expand the folder.
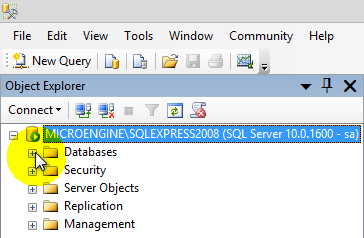
- You should found the XPNDB and XPNTR folder after expanding the Databases folder.
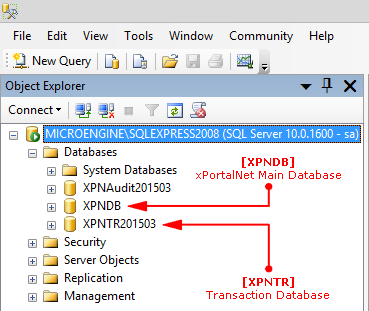
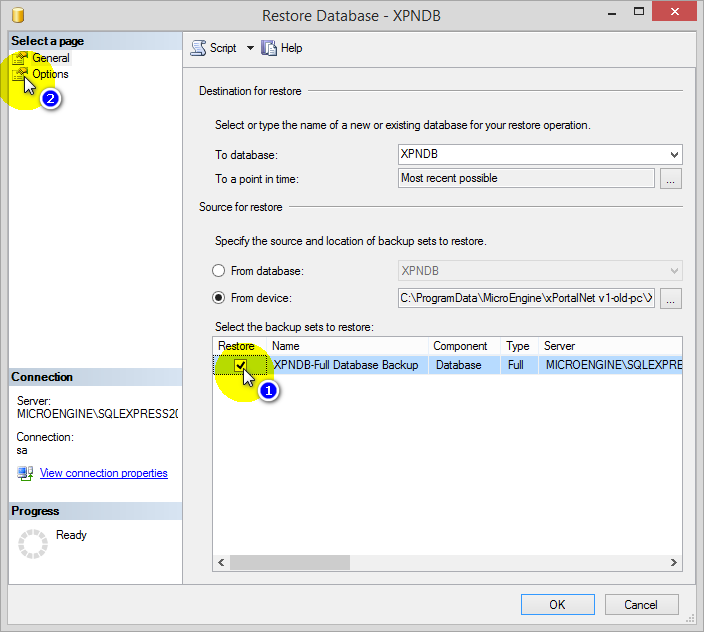
› If you notice the XPNTR folder shown is different, it is because the Transaction database is according to the month you initialized the xPortalNet database. - To restore the database, right click the XPNDB folder. Select Tasks › Restore › Database.

- The Restore Database – XPNDB window will be shown as following.
- Make sure the Destination for restore is selected To database: XPNDB.
- For the Source for restore, select From device then browse the back up database file.
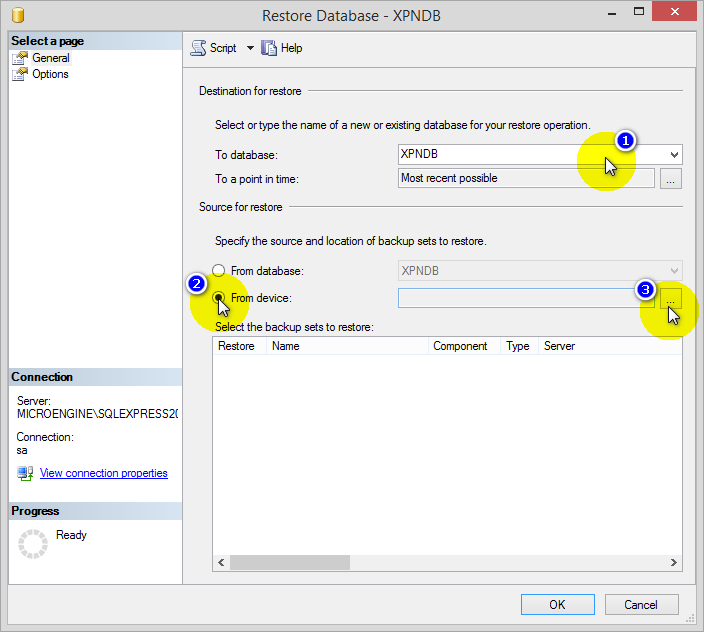
- Click Add to browse the back up database file.
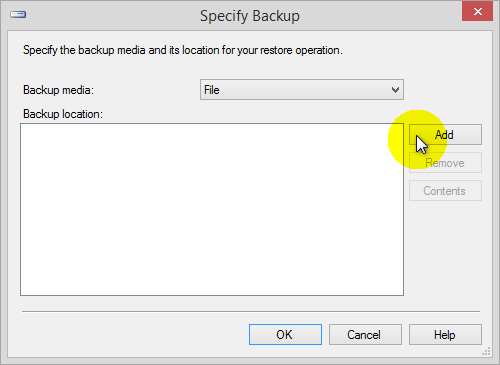
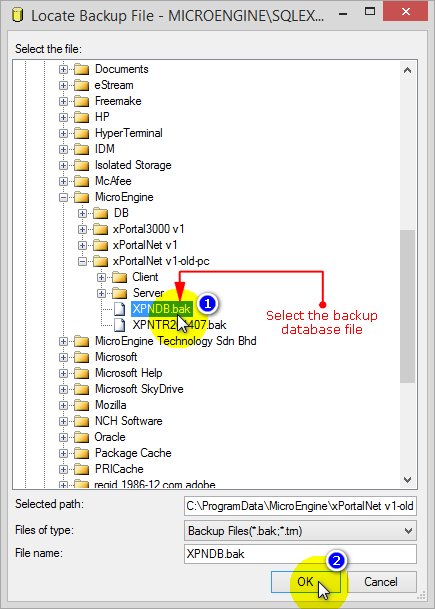
- Select the location of the back up database file. Click OK.
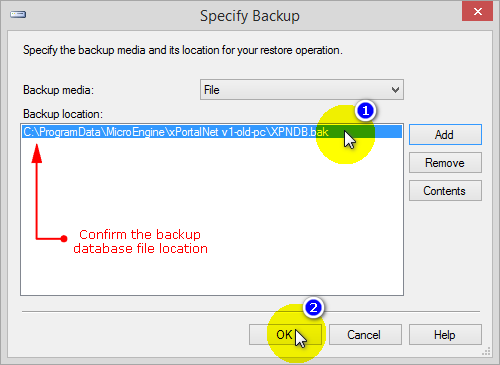
- Please confirm your back up file location.
- Click OK to continue.
- Tick the database that you wish to restore.
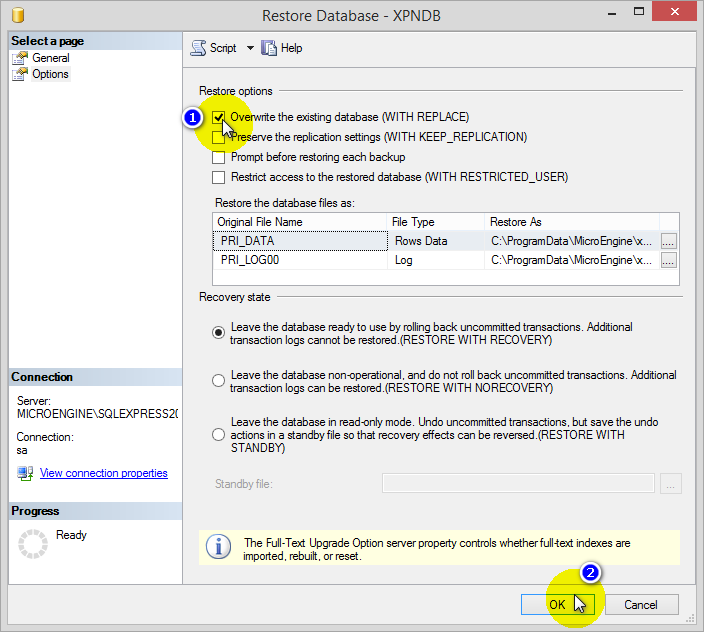
- At the top left of the windows, select Options page.
- At the Restore options section, tick the option Overwrite the existing database (WITH REPLACE).
- Click OK to start restore the back up database.
- You should see this pop-up window when the restore of database is completed. Click OK to finish.
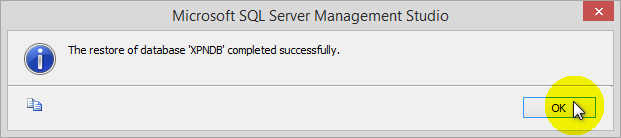
- Restore database is completed.
Custom Fields
- Summary: This article contains steps to restore the xPortalNet database from old PC to the new PC using existing backup files (.bak file format).
- Search Tags: restore, bak file format, xportalnet database, new pc
Related Articles
Comments
-
There are no comments for this article.
Submit Feedback on this Article
