


Advanced Search
Search the Knowledgebase


| Author: Microengine Views: 34291 Created: 13-03-2015 01:00 PM | 0 Rating/ Voters |
 |
This article contains steps to install xPortalNet software.
Applies To:
- Software xPortalNet v1.5
- Windows XP, Windows Vista, Windows 7, Windows 8, Windows 10, Windows Server 2008, Windows Server 2008 R2
 Resolution Summary Resolution
Please complete the following steps to install xPortalNet software:
Pre-requisite
Perform the following installation.
- Install the Microsoft SQL Server Management Studio.
- Plug in the license key - xPortalNet USB Dongle/ xPortalNet MCI Dongle (Optional).
Installation CD
Select the software to be install from the Installation CD.
Select the software to be install from the Installation CD.
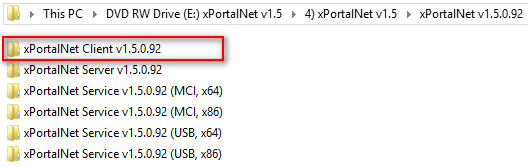
- Open the xPortalNet Installation CD.

- The following files will be shown.

- Open file 4) xPortalNet v1.5. The following files will be shown:

- Open the xPortalNet v1.5 version that you wish to install.
Installation 1: xPortalNet Service
This is the steps to install the xPortalNet Service.
- To start the installation, open the xPortalNet Service version folder that you wish to install.
- If using MCI as software license:
› Select the service installer of (MCI, x64) or (MCI, x86) - If using USB as software license:
› Select the service installer of (USB, x64) or (USB, x86) If Server PC's OS is 32-bit (use x86), if 64-bit (use x64).
 - Right click and select Install on the xPortalNetCommServiceSetup.msi.

- The following windows will be shown. Click Next to continue.

- At the License Agreement page, please read the License Agreement carefully.
- Accept the license agreement and click Next to continue.

- At the Select Installation Folder page, browse the installation folder by clicking the Browse button.
- Select user that is going to use the xPortalNet Comm Service.
- Click Next to continue.
 It is recommended to install at the default location folder.
 - At the Confirm Installation page, click Next to start the installation.

- Wait until the installation to complete.

- At the Database and Log Files Location windows, just leave the setting as default and click Save.

- You should see this page when the installation is complete. Click Close to finish the installation.

This is the steps to install the xPortalNet Server.
- To start the installation, open the xPortalNet Server folder.

- Right click and select Install on the xPortalNetServerSetup.msi.

- The following windows will be shown. Click Next to continue.

- At the License Agreement page, please read the License Agreement carefully.
- Accept the license agreement and click Next to continue.

- At the Select Installation Folder page, browse the installation folder by clicking the Browse button.
- Select user that is going to use the xPortalNet Server.
- Click Next to continue.
 It is recommended to install at the default location folder.
 - At the Confirm Installation page, click Next to start the installation.

- Wait until the installation to complete.
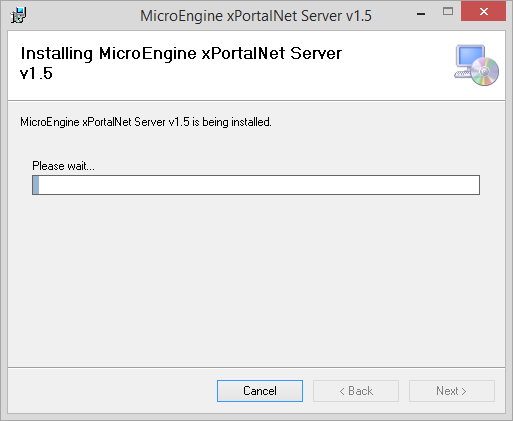
- You should see this page when the installation is complete. Click Close to finish the installation.

This is the steps to install the xPortalNet Client.
- To start the installation, open the xPortalNet Client folder.
- Right click and select Install on the xPortalNetServerSetup.msi.

- The following windows will be shown. Click Next to continue.

- At the License Agreement page, please read the License Agreement carefully.
- Accept the license agreement and click Next to continue.

- At the Select Installation Folder page, browse the installation folder by clicking the Browse button.
- Select user that is going to use the xPortalNet Client.
- Click Next to continue.
 It is recommended to install at the default location folder.
 - At the Confirm Installation page, click Next to start the installation.

- Wait until the installation to complete.

- You should see this page when the installation is complete. Click Close to finish the installation.

xPortalNet Startup - Initialize Database
- Run the software as Administrator. See
 Software compatibility issues.
 - Right click the xPortalNet desktop icon › Properties › Compatibility tab.

- Run the xPortalNet Service.

- Message that will be shown at your taskbar:
- Running

- Database Not Initialized Yet (First time running xPortalNet Service only)

- USB dongle license detected

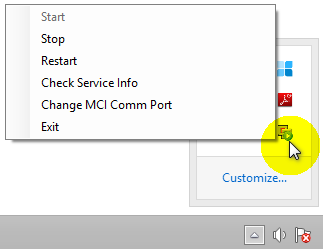
- To view the service status, right click the xPortalNet icon.
- Run xPortalNet Server to initialize the database.

- xPortal Comm Server will be shown as below:

- Fields that are boxed in red must be filled up. Make sure the Server Name is similar to SQL Server Name.
- To check your SQL Server Name, run the SQL Server Management Studio.

- Copy the SQL Server Name in the SQL windows.

- Paste the SQL Server Name at the xPortal Comm Server window.
- Password is the same as the SQL Server password. The password is created during Microsoft SQL Server 2008 installation, see How to install Microsoft SQL Server 2008? for the installation step.
- Click initialized database to continue.

- Wait until the configuration finished.
- You will see this pop up message after successfully initialized new database.

- Login to xPortal Server and xPortal Client accordingly.

Custom Fields
- Summary: This article contains steps to install xPortalNet software.
- Search Tags: installation, xportalnet
Related Articles
Comments
-
There are no comments for this article.
Submit Feedback on this Article
