


Advanced Search
Search the Knowledgebase


| Author: Microengine Views: 66002 Created: 17-12-2014 11:28 PM | 0 Rating/ Voters |
 |
xPortal3000 provided Startup Wizard to setup Door Access System easily. This article contains steps to setup new connection, controller and door(s) using the wizard.
Applies To:
- Software xPortal3000
- Applies to all controllers supported except XP-SNET
 Resolution Resolution Summary
Perform steps below to setup new controller accordingly.
- Log in to xPortal3000 Client.
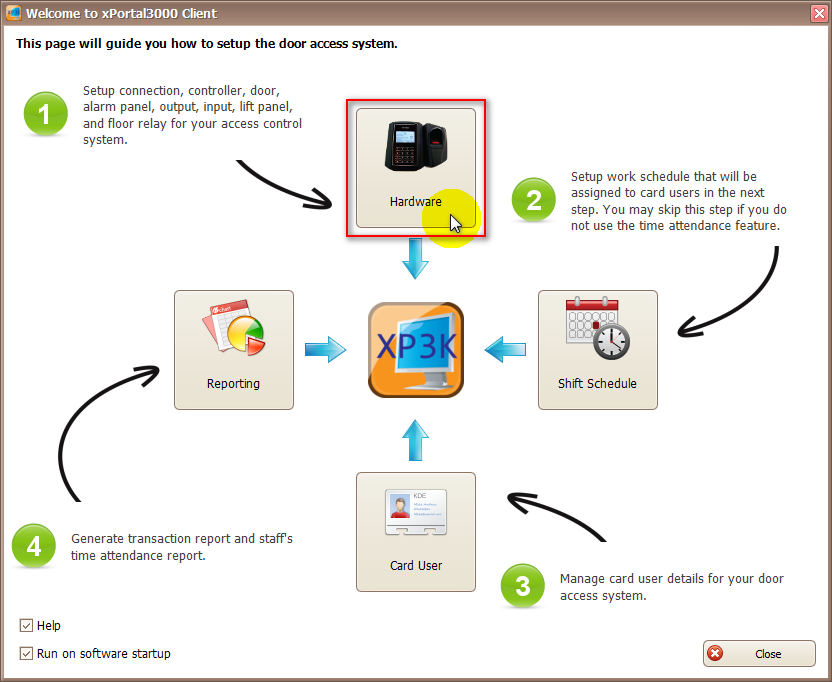
- Click on Startup Wizard.
- The following window will be shown.
- Click on Hardware button to setup connection, controller and door.
- The following window will be shown.
- This is Startup Wizard for Door Access/ Car Park.
- Click on New Controller Wizard button.
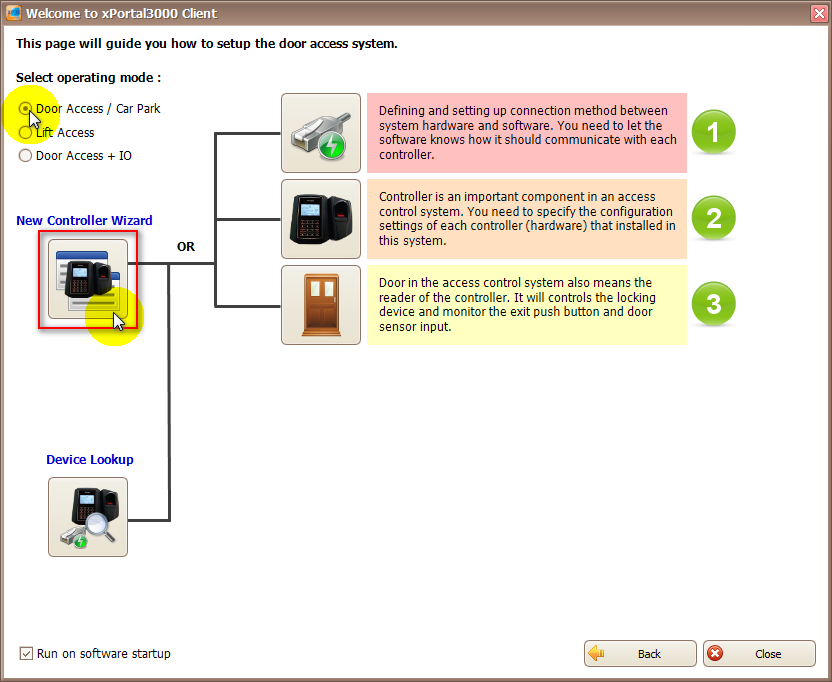
- The following window will be shown after selected New Controller Wizard button.
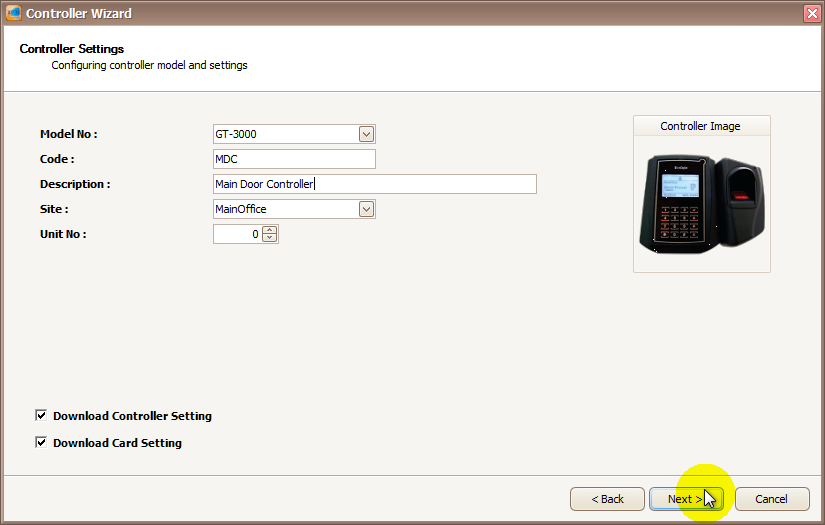
- Please ensure the controller model is listed from the Supported Controller List provided.If the controller model is not listed from the list, it means that controller is not supported in this software version.
- Click Next to continue.

- The following window will be shown.
- Enter the information of the controller as shown below. Code cannot be changed after saved.
- Click Next to continue.
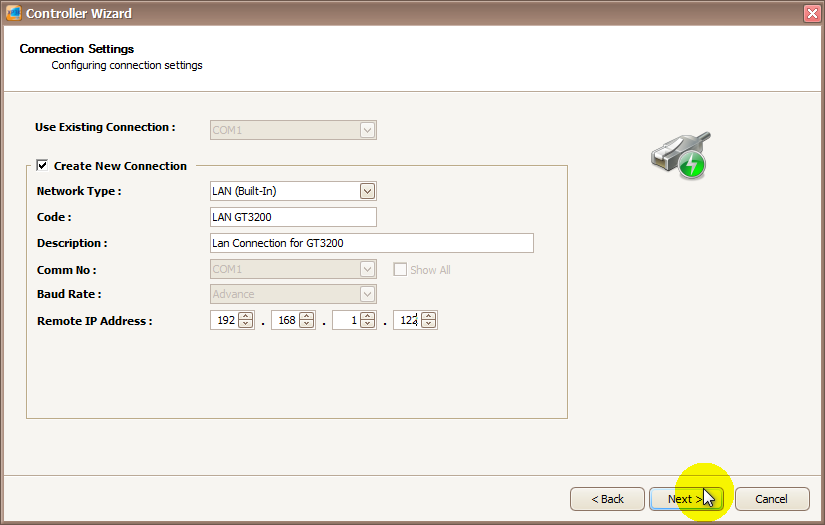
- Click Next to continue.
- The Connection Settings window will be shown.
- Enter the information of the connection as shown below.Code cannot be changed after saved.
- You may use the existing connection/ create another new connection."Create New Connection": Either Direct Serial Port connection or Local Area Network (LAN) connection.
- This is the connection setup using LAN.
- Click Next to continue.
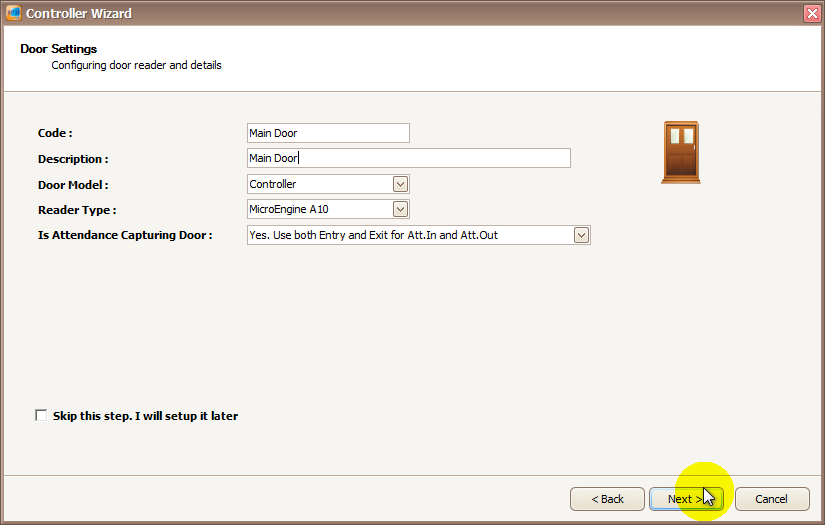
- The Door Settings window will be shown.
- Enter the information of the door as shown below.Code cannot be changed after saved.
- Click Next to continue.
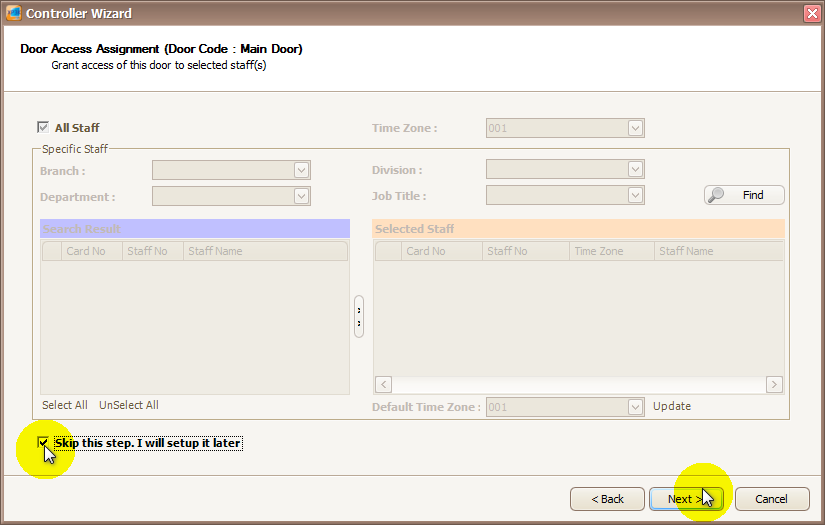
- The Door Access Assignment window will be shown.
- If you are configuring the door access for the first time:
- You will not see any staff records yet so you will not be able to select specific staff.
- Only default Time Zone will be shown: 000 (No Access) and 001 (Full Access).
- If you wish to setup the door access assignment later, check the "Skip this step. I will setup it later" checkbox.
- Click Next to continue.
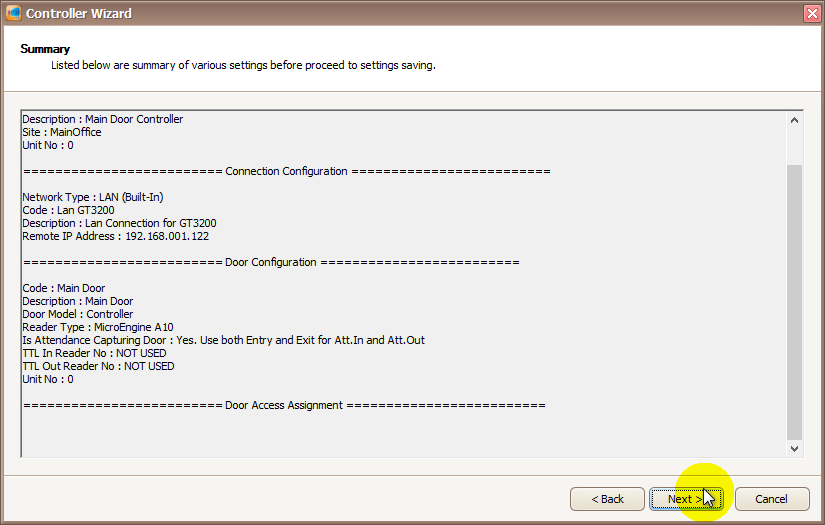
- The following window will be shown.
- The summary will shows all settings that you have set, before you continue on saving the settings.
- Click Next to continue.
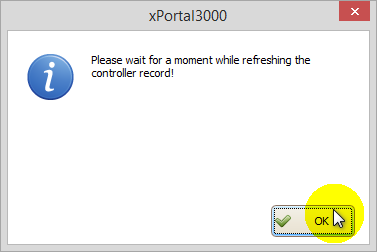
- The following pop up message will be shown.
- Click OK to proceed.
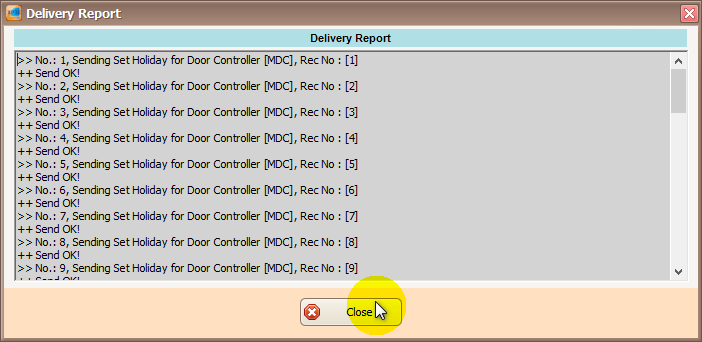
- Make sure your delivery report has no error and all sending data is OK.If there is any error during sending data, please check back the connection. Please ensure the controller is "Up".
- Click Close to continue.
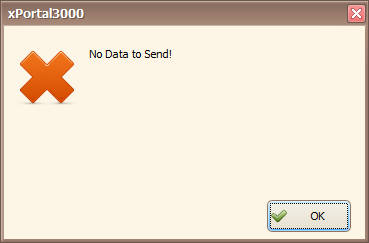
- The following pop up message will be shown twice.
- This message appear is because no data to send for Door Access Assignment.
- You may ignore this message if you have skip the door access assignment step.
- Click OK to continue.
- The following window will be shown.
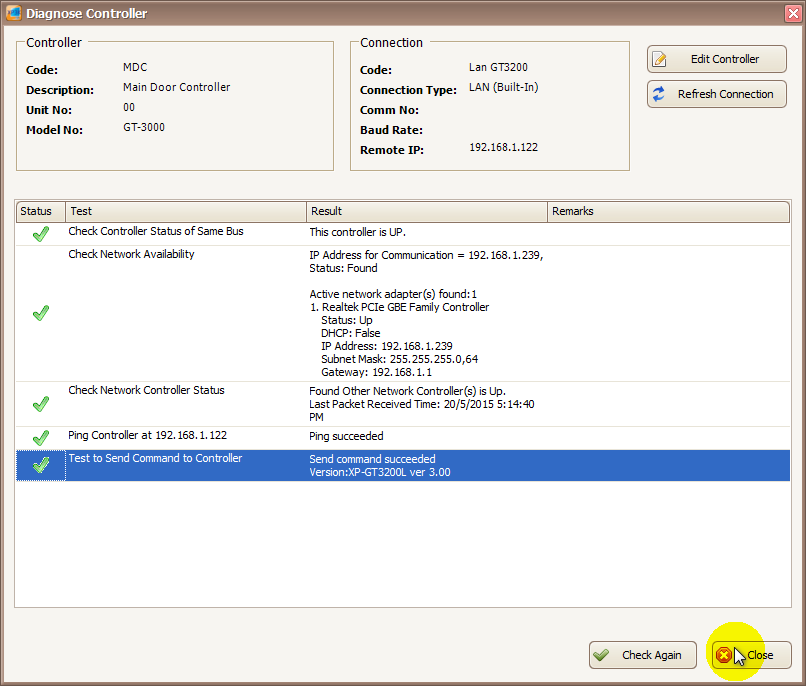
- You may view device settings summary or test the new connection added.
- Click "Test Connection".

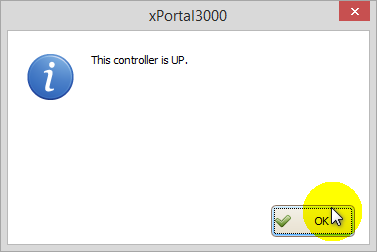
- The following pop up message will be shown which indicate the controller is already "Up".Controller "Up": Communication established between controller and software.
- Click OK.
- The status of all test conducted should be all passed remarks by green tick.
- Click Close.
- Click Finish to close the wizard.

- The software will be reloaded after saving each setup.
- Observe the Device List. The controller and door status should already "Up".


- You have completed the Controller Setup Wizard.
| Best Wiki by: KnowledgeBase Manager Pro v6.2.2 (Built with: JS.GUI - Rich Internet Application) |

Kindly given technical drawing for us to trouble shoot our system. Even we replace new unit of power supply. Main supply board fuse 4amp always blow off. Thanks.